 We all love freebies and there are some great websites out there that offer free stuff to help graphic designers with projects and ideas. Below are my favourite places on the web for free resources along with a few notes on using them in your work.
FREE FONTS My fave free font site is Dafont: www.dafont.com. It has an incredible number of free fonts. The site also has paid, donationware and demo fonts. If you wish to find a font that you are allowed to use for free on paid client projects ensure you tick the “Public Domain” and “100% Free” boxes when searching. That way you will only be shown totally free fonts with no restrictions (though I always suggest you check the license text file that comes with the font just to be sure). Also note some free fonts will have limited character sets. They may only have one font weight, only have upper case or may have limited characters. FREE PHOTOSHOP FILES AND ACTIONS A really good site for your Photoshop freebie needs is www.bestpsdfreebies.com. You will find all sorts of layered PSD files on here for mock ups, actions and effects. As with many freebie sites, there is also paid premium content on there should you want it. FREE PHOTOS Any graphic designer knows one of the hardest parts of any brief is getting decent images if they’re not being provided by the client. I've found www.pexels.com that's a great with tons of totally free images licensed under the Creative Commons Zero (CC0) license. This means the pictures are completely free to be used for any legal purpose both personal and commercial. FREE MOCKUPS A surprising resource I was recommended to check out was Pinterest (www.pinterest.com). Just search for “Mockups” and you will find a plethora of really well designed PSD mock up files to overlay your logos, business cards, brochures etc onto. THINGS TO NOTE WHEN USING FREEBIES There’s some great free stuff on the web uploaded by some very talented and generous designers. Please support them by liking, sharing and linking to their work and never use any restricted license or free for personal use items in commercial projects unless you’ve paid for them. We need to support those in our industry who are willing to put their work out there for others to use and why not offer something for free that you’ve created? It’s a great way to raise your profile and get recognition of your work. Finally, a word of caution. Alway have your antivirus up to date when downloading freebies or any files for that matter. Download links can often have annoying popups and while most files are totally safe, there is always a risk some unscrupulous person has hidden spyware or a virus in the file. Always scan any files you download before you open them to ensure they’re safe.
0 Comments
 For this blog post I thought I’d cover some of the things you can do when working with a graphic designer to help ensure they produce the best work for you and your money. These will also keep the designer happy and onboard with your projects.
AGREE CLEAR DEADLINES WITH YOUR DESIGNER This one is really important but often overlooked. Before you even agree the work with the graphic designer, have clear dates in your head for when you expect the first proof or concepts and when you want the final signed off piece of design made available to you. This not only gives you a critical path so you know when to expect something back, it also helps the graphic designer plan his time and projects. MAKE YOUR BRIEF AS COMPLETE AS POSSIBLE The starting point of all graphic design work is the client’s brief. It’s your chance to explain to the designer exactly what you want and expect. If done correctly, it can make the whole process much easier for you and the designer, resulting in less proofs, a quicker turn around and a better end piece of artwork. Take a look at my other blog post “What to put in a design brief” for a more detailed post on this. http://www.destinationcreative.co.uk/my-blog/what-to-put-in-a-design-brief PROVIDE SOME INSPIRATION You don’t need to tell the designer exactly how to do the design, after all that’s what you pay them for but it can help both of you if you provide a mood board or links to images or websites that have the same look and feel that you’d like used in your own project. GIVE CONSTRUCTIVE FEEDBACK If, when you see your first draft from the designer, you really don’t like the look of what has been produced then don’t just tell them you hate it and they need to come up with something else. You need to explain what elements you don’t like, why you think they don’t work and what you were expecting. This helps give the designer some creative direction. RESPOND TO QUERIES QUICKLY Sometimes, even when you’ve provided the graphic designer with a great brief and all the content they need, there will still be questions. It can be clarification of which image to use, too much text to fit in a certain space or just something which isn’t clear. Often, a simple one line answer is all that is needed but you need to ensure you get back with an answer as soon as you can to keep things moving.  Once you’ve found the ideal freelance graphic designer to work with on your project you will most likely be asked by them to send through a design brief. Don’t worry, it’s actually pretty straight forward and is just a document giving the graphic designer the information needed to complete the work for you.
Here are the main pieces of information needed in a design brief: A TITLE FOR THE PROJECT AND VERSION NUMBER This is so both you and your designer know exactly which project you are talking about when discussing the work. This is especially useful when it’s part of a large, multi piece project. As design briefs often evolve and change, adding a version number also helps ensure everyone is looking at the same brief. A PROJECT OVERVIEW This doesn’t need to be a War and Peace. It just needs to be a simple overview of the reason for the project and, most importantly, the goal of the artwork your designer will produce. Is it to drive footfall into your store or to promote a special offer? Giving this kind of information allows the designer to know how to create something that best achieves your aim for doing the project. ARTWORK SIZE AND PAGE COUNT Confirm what size the artwork should be and also page count. This stops there being any misunderstanding and your little A5 flyer turning into an A1 poster! TIMESCALES AND DEADLINES This can be a really important one to include and is often one people leave out. Set a date you need to receive first proof by, when you will provide amends back to the designer and when the deadline for supplying to the printer is. This not only helps the designer manage their time but also gives you an agreed timescale in writing should there be any issues. CONTENTS This one depends on the size and complexity of the project. Sometimes you can provide the text content for the project within the brief itself. This works for relatively small, simple briefs but if you’re working on a 100 page catalogue then I’d suggest providing it in a separate text document. REQUIRED ELEMENTS Finally, if you have any icons, images or other elements you want the designer to include, make a note of them in the brief. Whilst you should never provide images, logos or icons by embedding them into your brief (they should all be sent as separate files) it helps the designer if you explain where you’d like them to appear if you already have a preference.  We often think of customer service as one of those things you look for when going into a shop or dealing with a large company, but even a freelance graphic designer can aim to give their clients a good customer experience.
For this blog post have listed 5 simple things we can do to provide our clients with good customer service, ensuring they want to work with us again and again. 1) RESPOND TO EMAILS AND MESSAGES QUICKLY The one thing that clients hate most is waiting answers. Whilst most of us freelancers tend to be self employed and not have an army of assistants, we can take advantage of mobile technology to enable us to respond promptly. It doesn’t have to be a complete response, sometimes a quick “thank you for your email, I’ll get back to you later today with an answer” is enough. Which brings me neatly onto to tip number 2… 2) ALWAYS KEEP THE CLIENT UPDATED This is particularly important when working on large or longterm projects. Give clients updates on the progress and let them know that you’re still on target to meet the deadline. You don’t need to bombard them with detailed emails all the time but just a little progress report now and then helps keep their mind at ease and is good practice. 3) HIGHLIGHT TYPOS AND ERRORS TO THE CLIENT There is a saying in design, “not just a crayon pusher”! It means don’t just plop in text with errors and typos thinking to yourself, “it’s not my problem, I’m just the designer”. Let the client know of errors and check if they’d like it correcting. Whilst it may not be a graphic designers place to edit someone else's words, it’s good customer service to highlight it to the client so they can be corrected before they are published. 4) ALWAYS BE HONEST Always tell the client if you can’t achieve a deadline or if a project is more complex than you thought. If you suddenly realise it’s more work than you estimated or will take longer then pick up the phone and talk to the client to let them know. People are often grateful for your honesty and it will help you both review the situation and find the best solution. 5) GO THE EXTRA MILE Sometimes it’s the small things that make a difference. Try to exceed your clients expectations. Delivering artwork ahead of deadline or providing them with some ideas of your own for a project all help add a bit of value to the service you’re providing.  Being a graphic designer is great. In fact, it’s so great that lots of people want to be one. So, in order to get noticed, you need to make sure you actively let clients know you’re out there and ready to do some top quality work for them.
In this blog post I’m going to list 5 things that you, as a graphic designer, can do to raise your profile and make people aware that you’re here and ready for hire. All 5 of them don’t cost a penny to do, which is especially good if you’re just starting out in the world of freelance and don’t have much of a budget for self promotion. 1) WRITE A BLOG This just had to be the first one on my list as I’m writing a blog post about it! Set up a blog on your website and write helpful articles that show your expertise as a graphic designer. Try to write some posts aimed at fellow graphic designers and some posts for clients to show them you know your stuff. A blog is also a good way to get your site further up in the search engine results. Sites like Google always love fresh, original content and will prioritise those sites over outdated ones or ones using content copied from other places. I will admit it’s hard making time to write post when you’re busy with projects but I personally think it’s well worth while. 2) BE ACTIVE ON SOCIAL MEDIA Hopefully you’ve already got yourself set up on LinkIn, Twitter and any other social media sites you decide to use but just setting up a profile and then forgetting about it won’t get you noticed. You need to regularly be active on them and let people know you’re around. You can use tools such as Hootsuite to help manage and automate some of this but I also think you need to get on there and interact with people. 3) GET LISTED ON WEBSITES The more places on the internet you can get your name the better and a really easy way to do this is get yourself listed on website. Yell.com is a good one to start with. It’s free to get yourself listed for your local area but be aware, they will try to get you to then pay for being listed in other areas. If you don’t have budget for it just tell them that and you’ll still have your free listing. Local councils often have a local business listings website that is free to get yourself on to. My local one for Worcestershire is finditinworcestershire.com and I have my own business listing, logo and contact details on there. 4) MEET PEOPLE It sounds obvious but you do need to get out and shake a few hands, put a few faces to names. People always deal with people and no matter how good your branding is or how slick your website looks, clients often choose a person they’ve met and like. Take advantage of any meeting, planned or otherwise, to promote yourself and your business. Always carry a couple of business cards and always be polite and courteous. Don’t got for a hard sell approach with people, just let them know who you are and what you do. 5) WORD OF MOUTH I’ve saved the best for last. I think this probably the single best way of getting known as a graphic designer but also the most difficult one to do. Never be afraid to ask clients who you’ve completed a project for to recommend you if they think you’ve done a good job. Even give them a few extra business cards in case they can pass them on to anyone. People are much more likely to take a recommendation from a friend or colleague than all the above put together. Just make sure you leave a trail of happy clients behind you and you will find word gets out and people will start contacting you. 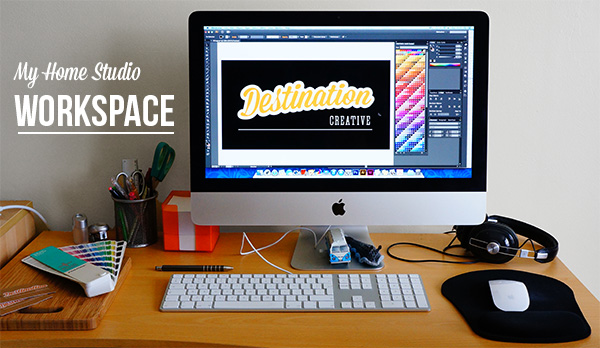 For this blog post, I thought I’d take you through my home studio workspace (shown in the header above) and explain some of the choices I made when setting it up.
Every graphic designers workspace will be unique to them and is influenced by many things including available space, budget and how they like to work. I have one desk for my digital work on the iMac and another that I can use for paperwork, sketching etc. So lets go through what makes up my workspace: Desk It’s a pretty compact desk due to space restrictions and most of it is used up by the iMac itself. It’s actually a good thing that it’s small though, as it prevents me from cluttering it up and forces me to keep a clear work area. Try to ensure that your desk gives you a comfortable work height in combination with your chair. Long hours sat at it can cause back problems if it’s not right. I’ve placed the desk so I have a big window to my right giving me plenty of light without getting reflections off the screen. Apple iMac This is my workhorse that produces most of my final digital artwork. For the tech geeks out there it’s a 21.5-inch, 2.9 GHz Intel Core i5. I doubled the memory to 16GB to help speed up the memory hungry stuff like Photoshopping some of the large, hi-res images I work with. I decided to go with this rather than a Macbook Pro as I don’t think it’s good practice to spend a lot of hours hunched over a laptop and prefer a nice, big screen area. Apple Wired Keyboard & Cordless Mouse I chose the wired keyboard with number pad over the standard Apple cordless keyboard as I don’t see the point of going cordless as I’m always sat in front of the screen. I also prefer the number pad as it’s much quicker and more comfortable for me to input numbers with and I like the extra keyboard space. I went with an Apple cordless mouse as I prefer how it feels over a corded one and like the multi-touch surface. I also always use a gel mouse mat with wrist support to help prevent RSI. Panasonic RP-HTX7 Headphones These aren’t just for blasting out my music without annoying the neighbours while I work. There’s an important role they play in my home working. My home is also my workspace and there are times when I need to close out distractions around me to concentrate. It’s unfair to expect others who share my home to sit in total silence while I’m working. The headphones are excellent for sealing out ambient noise and enables me to focus while around me other things are going on. My wife has however, pointed out how it never seems to filter out the sound of her offering to make a cuppa! Stationery I always keep a pen and some kind of note paper near me. Even with all the digital technology around us, sometimes scribbling a note or sketch is a great way to record an idea. Pantone Swatches As most of my work is in print it’s important to remember that, no matter how well calibrated my monitor is, the colours on screen will rarely look the same as when printed. A quick check of this will show what I thought was a nice subtle green is actually a really punchy lime on paper. Fun and inspirational “stuff” If you’ve got a keen eye you may have noticed in the picture of my desk a VW camper 3D puzzle, a knitted slug and a bamboo chopping board. Why? Well, it’s my little piece of the world where I spend a lot of my time and I want to be surrounded by stuff that inspires and amuses me. I love the tactile texture of wood (you’ll see its influence in this website’s design) and dream of owning a VW camper. The slug gets a lot of squishing when I’m stressed (poor thing!). A sterile, minimalist desk does not make a good creative environment in which to work. So that’s a quick tour of my personal workspace, I hope you enjoyed reading it. We’ve all seen an advert for a product and immediately recognised which company it’s from before even seeing the logo. How come? Most probably because of a simple but clever thing called brand constancy.
WHAT IS BRAND CONSISTENCY? At its most basic, brand consistency is using the same colours, fonts and styles for all marketing and media produced by a business. It’s giving each piece of communication produced the same look and feel. Most companies do this by having something called “brand guidelines”. This is a list of rules on how their branding should be used. WHY IS IT IMPORTANT? Being consistent with brands help build familiarity for customers and in turns helps with something called “the customer journey”. When the customer visits a website, then sees an advert that uses the same branding, they will already know who it is and have a mental connection with that company or product. When it comes to them making a choice for a purchase, by the time the customer enters the shop or goes to your web store they will already have the confidence knowing who they are dealing with and are much more likely to make a purchase. Making sure brands are instantly recognised through consistent styles are also great for customer loyalty as they will return to brands they know and have had a good experience with. IS BRAND CONSISTENCY FOR ME? Good brand constancy is for anyone with a business where customer confidence is important and that’s pretty much any type of business. It isn’t just for large international corporate giants. No matter what size your business, you can help your customers recognise your brand and build that confidence in them dealing with you. HOW DO YOU GO ABOUT DOING IT? Getting some brand consistency isn’y as difficult as some people think and can be as brief as a sheet of A4 paper. If you are in the process of starting up your business, any good designer or agency should offer you the option of producing brand guidelines to accompany your new logo. If you are already an established business, guidelines based on you existing creative can easily be written. WHAT SHOULD BE IN BRAND GUIDELINES? The first thing I usually add in to the brand guidelines for a client is the logo. I specify the colours of the logo as Pantones, CMYK and RGB colours, so not matter where it appears it looks consistent. I also offer a single colour and a white out logo option. Then I set rules for something called “logo clearance”, this just explains how much empty space to leave around your logo so it stands out. The next thing to specify is the font to be used in all marketing material. This is just as important as the logo for giving a brand familiarity. You can even specify the size and weight of the font to use for headlines and titles etc. After that it’s up to you how much details you add. For most small businesses that’s enough but you can go on to add more detail if you feel your brand needs it. Everything from style of photography to the tone of voice used in written text. Every freelance graphic designer will have times between projects when they think they've nothing to do. In fact, when you're a freelancer, there is always something you can do to help improve your business and yourself as a designer.
Below are five suggestions of stuff to try when it's a bit quiet. None of them need take up that much time and may go towards helping you get new clients and projects. 1) WRITE A BLOG POST That's exactly why I'm writing this now! I'm currently waiting for clients to send me content for two projects, so rather than sitting here watching random Youtube videos of dancing kittens, I thought I'd do a blog post. Writing a blog is great for your website's SEO (Search Engine Optimisation) as it show Google and other search engines your site is being regularly updated which moves it further up the ranking in search results. It also give you a chance to demonstrate your knowledge and expertise to the world, which is always a good thing. 2) WORK ON A PERSONAL PROJECT We all love doing stuff for our clients but every now and again it's just so nice to do a personal project for no other reason than the love of designing. Whether it be a typography poster, a photography project or designing some logos just for the fun of it, you can flex your creative muscle free of anyone's brand guidelines and briefs. It's a perfect way to show your skills and express yourself. Don't forget to then put it on your website to show potential clients what you can do. 3) LEARN SOMETHING NEW If you've no projects pending then you can use the time to go online and read up on a new skill. It can be something as simple as following a few Photoshop tutorials online or buying a book on something more in depth like CSS. You have to be honest with yourself and admit the weak points in your skill set, then go about resolving this. There's nothing wrong with not knowing something and every new skill you learn makes you a more proficient designer and able to do something new. 4) GET SOME INSPIRATION We can all easily get into a creative rut, I've been as guilty of it as anyone. When you've time to spare, go and find some inspiration for new ideas. It can be something as simple as browsing through sites like Pinterest or Inspiration Feed, or you can go one better by getting outside for a walk and taking some photos (it's always good to have a library of your own shots to use on projects). You need to expose yourself to new things to keep fresh so when the next design brief comes in, you will have lots of innovative ideas to bring to the graphic design table. 6) WORK ON YOUR SOCIAL MEDIA PROFILES Social media is a great tool for advertising your business and raising your profile in the industry but it does require a bit of regular effort and housekeeping to make it work for you. Take a little time to tweak your profiles, be it Facebook, Twitter, LinkedIn or any other and make them stand out so people can find you. Little things like ensuring you have a profile photo, whether it's your lovely mug or your logo, can help. Check the profile or about me text that describes you and your business is correct and keyword rich. Make a nice background or header (you are a designer after all) and demonstrate good brand consistency across them all. While you're there, check for any dodgy spam accounts to block and have a tidy up. So you've decided to go for it and take that step into the exciting world of freelancing and one of the first and, in my opinion, most difficult things you need you need to do is think of a name for your business.
To help you along, I've put together my five top tips of things to consider when choosing your business name, compiled from my own experience and research into the subject. 1) HAVE THE NAME MEAN SOMETHING TO YOU PERSONALLY Whilst there are many business name generators out there on the web, your business name needs to mean something to you personally. It should either say something about yourself, your business or, if you're going down the abstract name route, have a connection or story behind it. Clients will often ask how you got your business name and just saying, "I just picked a random one" doesn't really demonstrate your creative skills to them. 2) MAKE SURE THE DOMAIN NAME IS AVAILABLE You'll want the domain name of your website and email to match your company's name, so once you've got a few potential names the next thing I suggest you do is use a "Who Is" lookup tool such as whoislookup.com to check and see if it's available. 3) PRACTICE SAYING IT OUT LOUD This one may sound a little strange but you will find yourself answering the phone and talking about your business a lot. Just pretend you're answering the phone using your business name and even try it out on people. If the name is long, tricky to say or easily misheard then you should consider another one. 4) ENSURE PEOPLE CAN SPELL IT One of the names I initially thought of for my business was Flex Creative. I thought it was easy to say and (at the time) the domain name was available. Then when I spoke to someone about it the thought I meant "Flecks" rather than "Flex". This kind of issue could cause your potential clients some confusion and result in you losing business due to them not being able to find you online. Make sure your business name can only be spelt one way and isn't susceptible to misspellings. 5) LIVE WITH IT FOR A FEW DAYS Once you have what you think is the perfect name for your business, the last thing I suggest you do with it for a few days is... Nothing! Just live with it and keep saying it, looking at it and talking to people about it before you decide to go ahead and use it. The reason for this is that hopefully your creative empire will be around for a long while and you will be looking at, saying and typing your business name every working day. If you find yourself getting fed up with it after a few days, have another think in case it's not right one for you. But, if you still love it, then go ahead and register your domain name, design your logo and go get those clients! Hi and welcome to my blog. I hope to post on here regularly. For my first post I thought I'd show you the business card I designed for myself. 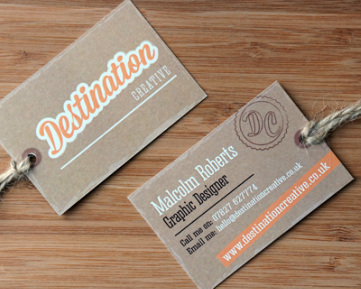 It's very true what they say, designing for yourself is the hardest project of all! After deciding on my company's name of Destination Creative, I created my logo (which I will cover in another post soon). Then it was onto the job of my business card. After looking through lots of web articles and blog posts on creative business cards I knew I wanted something a bit different to reflect me and my style.
With the name of Destination Creative I got on to thoughts of travel and started to think about vintage style luggage labels but with a bit of a fresh modern twist to it. I took a scan of a manila card background and gave it a worn faded edge effect. For text I used the wonderful Corki font, available free here and used my logo on the reverse. I put my website URL on an orange background to echo the colours of my logo and then drew a brown circle to look like a hole punch reinforcement on both sides. My cards were printed by my local printer on some really nice quality heavy 350gsm uncoated stock. They also kindly drilled a hole in each one for me. My wife brought a reel of jute twine and sat there looping a length through each card to complete the luggage label effect (bless her!). The twine comes off in one pull leaving a standard size business card to keep in your wallet (creativity is nothing if it's not practical too). And that's it, my cards are now complete! When I give them out I always get great comments and people seem to really like them. I think first impressions are so important and your business card should always say something about your personality as well as who you are. |
AuthorMalcolm Roberts is a Worcestershire based graphic designer, blogger and lover of all things creative. Archives
July 2017
Categories
All
|
 RSS Feed